How to Use Riker Mounts MK II:
In my first article on Using Riker-Mounts, I sort of skipped the tedious bits on actually attaching your cherished collectable to the inside of your mount. I dealt with color and light and design and all. Good stuff, but all for naught if things don't stay where you have so artistically arranged for them to be displayed. I hereby correct this oversight.
The following describes the easiest possible way to showcase a single valuable collectable -or a bunch of small items -or a flat but not-so-small collectable, or any-dang-thing you are proud of. Depending on what you want to display, it may be as simple as opening the mount, placing your collectable in it, and closing it up again. You will only need to follow Steps 1 thru 5.
BUT If the item is delicate or heavy, you might need to go to a little extra bother of tying it in place -Steps 6 thru 9.
Have fun.
Step 1: Gather up your stuff.
 If you have purchased one of my Riker-frames, I have tried to send along everything you might need to mount yourself a nice little display. You might need to find a piece of color-coordinated fabric and a suitably refreshing beverage. If you have read my other Collector's How-To articles, you know I'm a big fan of beginning tasks with careful gathering-up and this includes a suitable beverage. Find some scissors to cut the fabric and some tape to hold it down, almost any sort of tape, and a label! I'm also a big fan of labels. Often the only difference between some dang-fool knick-knack and a real collectable item is a label.
If you are using your own Riker-mount, you might also need to run-down some cardboard and either fine wire or some thick mono-filament fishing line, in addition to the fabric, scissors, and tape from above.
Step 2: Do a little preliminary composition.
 This may be as simple as centering a single object in a oblong, or a more elaborate effort involving symmetry and other art-class words. (This is where Using Riker-Mounts covers doing this with panache.) ('Panache' is a real word -means a grand or flamboyant manner; verve; style; flair. Whoop-de-dang-do!)
NOTE: If you have smaller items -or particularly valuable items -or both, and you don't want to -or can't- hold them in place by simply mashing them against the glass, you will want to tie them to a backer board. Skip down to step 6 for this.
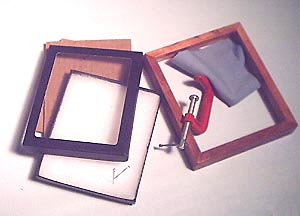
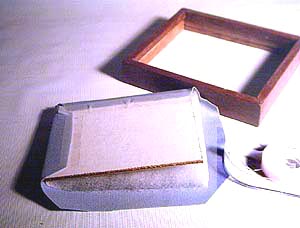
Step 3: Make sure the Riker-mount closes!!!
 Don't neglect this important step. In my case, the padding was thick enough to push the C-clamp against the glass front of the mount and so it needed no more elaborate attachment. I also added a piece of soft gray knit fabric. For the smaller cases, you might get away with simply cutting the cloth a little oversize, draping it over the bottom part of the box and sort of cramming the top down over it all. This will do an admirable job of holding it in place -as well as stretching it out nicely. That's what I did for this picture.
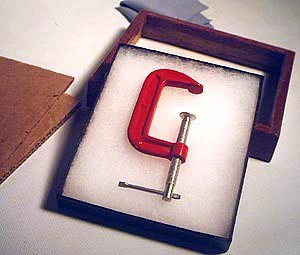
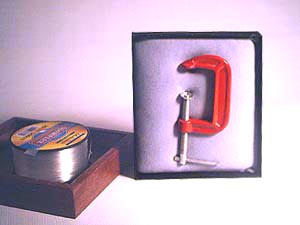
Step 4: Pin the top / lid in place.
 Notice that I did a final repositioning and moved the little sliding bar at the bottom of the clamp to the right. Seems to me to look better this way. You can skip the pins on the smaller mounts, but you had better put them in for larger cases with more valuable collections. You can just see the pins sticking out on both sides of the mount.
Step 5: Call it done and hang it on the wall.
![]() A hammer to drive a finish nail into the wall to hang it is all it takes, but for the bigger Riker-mounts, you MUST Hang it on the Wall CORRECTLY.
A hammer to drive a finish nail into the wall to hang it is all it takes, but for the bigger Riker-mounts, you MUST Hang it on the Wall CORRECTLY.
(The picture is part of Ed's arrow-head collection. His kid's got together and gave him one of my Riker Drawer Cases for Christmas. If BTW, if you have a dedicated collector in your life, and Christmas or a B-Day happens along, check out my thoughts on Gift-Giving for the Collector in your Life.)
NOTE -before you go on to the fancy / slightly more difficult / RIGHT way to do things:
If you purchased a Riker-frame from me, 2 pieces of cardboard are included. There is a single thickness about 1/8" thick, and a double wall about 1/4" thick. Depending on the thickness of the item you want to display, you can use nothing except the poly padding & fabric and have 5/8" or so to work with. The thinner piece of cardboard will give you about 1/2" -and makes the fabric part easier. The double wall cardboard will give you 3/8" between the poly-fill and the inside of window-glass. Both pieces of cardboard plus the padding would give you about 1/4" to work with. With this many options, fiddling about with mono-filament fishing line might be completely unnecessary. None-the-less, tying is probably the safest way to go.
Here's how.
Step 6: Wrap fabric around your backer-board.
 Cut your fabric an inch or so bigger then the cardboard backer. Snip off the corners such that there is abut 1/4" on a diagonal from the corner of the cardboard to the snipped section of cloth. Make sure that the pretty side of the cloth is down and put the padding down on the middle of the cloth, and put the cardboard down on top of this. Four hands are helpful about now -one to compress the foam with the cardboard, two to fiddle with the tape, and the last hand to help hands 2 & 3 to smooth, stretch, and tape the fabric down.
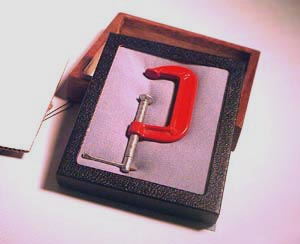
Step 7: Pierce the cardboard for the ties.
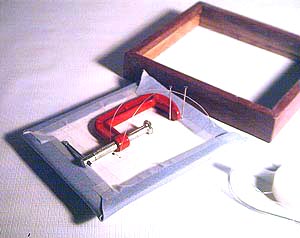 You will need two holes for each point you tie. Easiest to do this from the back, but remember to REVERSE your item. Probably not that big a deal for an old C-clamp, but if you are displaying letters, you are going to feel pretty silly if you forget this step. (And YEP, I've done this sort of thing more'n I'd care to admit.) I am using two ties here. You can just see the fishing line coming out toward the bottom of the clamp and the pins through the top.
Step 8: Tie your collectable item in place.
 I may be guilty of exaggerating how easy it is to use Riker-mounts, and this is where it gets hard. Not hard so much as annoying and fussy. The difficulty arises with poking the mono-filament through the cloth on the way from the back to the front, and then -when you pass the line back from the front, through the fabric, through the foam padding- finding the little hole in the cardboard. A big old sewing needle might be useful, or heating one of the closing pins with a cigarette lighter and melting a little hole in fabric and padding, but I suspect that no matter what you do, patience and persistence are the keys.
I send along a heavy gauge mono-filament fishing line with my Riker-frames. I like this because it's ever-loving strong and it disappears when it's doing its job. Truth to tell, thinner fishing line -while more likely to break- is going to be easier to thread through a sewing needle, and a needle is going to make you life easier about now. Wire works well too. It doesn't disappear quite as well, but is easier to poke through things. Do this. Try it with whatever you find in the garage, sewing basket, work bench or tackle-box. If & when you run out of patience, schlep off to the store.
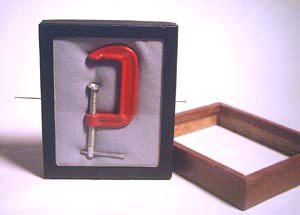
Step 9: Close it up and hang it on the wall.
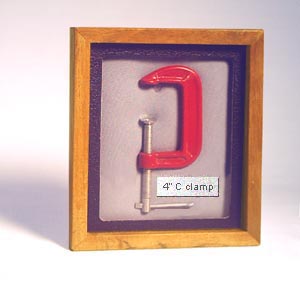 Notice that I straightened the C-clamp? Look closely at your work. No one is apt to ever notice a little unevenness or crookedness, but you will, and it is the nature of collectors to be fussy-particularly about their collection.
Notice that I didn't include a label? Shame on me! Don't make the same mistake. Perhaps nothing more then the date and place you acquired it will elevate it even further into the realm of a fine collectable.
(I cheated & added a label with PhotoShop.)