JUST A LITTLE MORE COMPLICATED:
Glue is the next step up the ladder of doing things right. It is however not reversible. This means that once glued together, the cases can not be rearranged and adapted as your needs change and grow. Besides which, they need to be clamped together in some way while the glue dries. One of the best ways to clamp them together is to use screws. But if you are going to use screws anyway, why not use a few more and dispense with the glue altogether? In this way you can take it all apart and rearrange it.
Easiest and best is to use course-thread 1 1/4 inch drywall screws. As to clamping the cases while you drill the holes, a 'C' clamp is a very handy thing and ought not cost more then $5.00 to $10.00. A good sized one with a deep throat is a VERY handy thing. Even handier -but more expensive -is either a deep throated vice grip or a one of those new-fangled one hand clamp things-(great Christmas gifts for any handy-people in your life because they are just a little more expensive but VERY handy things). With practice (and big hands) these tools can be used with one hand. You will also need 1/8", 3/16" twist bits, and a countersink bits. A portable battery-type drill with a driver (-the doodad that goes into the drill used to drive screws), is also very handy about now. There are a few tricks to make the whole thing go easily.
FIRST: Give a little thought as to where to drive your screws. Unless you plan to run around on top of it all, a screw between each adjoining case ought to be enough -maybe two if you are using tall cases. Ideally, in the center of any side, but lets' face it, it is easier to work at the front of the case. Do your best.
SECOND: Drill the pilot holes while the cases are clamped together. Use the 1/8 inch twist bit, and don't worry if you drill all the way through both cases. (This presumes you are attaching cases side-to-side or top-to-bottom and are working from the inside of the cases.) Two holes at the front of the case, and a third one at the back are probably sufficient. Just be sure that the back of the cases are lined up as well as the front. You will obviously not be able to get your clamp into the back of the case so be attentive to this. Move your clamp from one joint to the next as you drill the 1/8 inch holes, and do not forget to drill up and down as well as side-to-side if you are going to stack the cases on top of each other.
THIRD: Separate the cases -or slide them out of position for a moment while you drill the shaft holes, (the holes you are driving the screws through), and counter sinks. This is important because you want to get the sawdust out of the joint, and you do NOT want to enlarge the pilot holes, (the holes you are screwing into). You can either use the 3/16 inch twist bit and a separate counter sink bit, (a "V" shaped hole for the head of the screw), or use an appropriate stepped bit. I do not suggest using such bits to drill everything at once though. They are never the exact size you need, and it doesn’t take all that much longer to use separate bits. Be particularly careful to get the screw heads well countersunk in the bottom of any case so they do not interfere with the drawer.
MORE SOPHISTICATED MATERIALS:
Now to move up the ladder as involves your choice of a surface or counter / desk top. Doors are good things, but have their limitations. The next step up the ladder would be to use some sort of sheet stock. Particle board is ugly, but cheap, fairly strong, dimensionally stable, and doesn’t give you splinters. You might also see if your local store has Melamine board, (particle board with a hard smooth white finish). Much the same could be said of medium density fiberboard (MDF), but while it is more expensive then particle board, it is also smoother and it is possible to give it an elegant painted finish. MDF comes in heavier thickness then particle board, (up to 1 1/4 inch), but may not be as easy to find at the home improvement store.
The ultimate is to use an high quality 3/4 inch hardwood plywood. Oak ply is widely available and a noble wood to be sure. This stuff is beautiful when finished correctly, but for the problem of it's edges - and the splinters that live on the edges of plywood. The edges simply HAVE to be finished in some way. No amount of sanding and finishing will EVER eliminate the possibility of getting a splinter, and plywood splinters are particularly nasty splinters. The fastest and easiest way to treat the edges of plywood is to use iron-on edging. But it tends to come off in a year or so. Next better is to use a glue on veneer. Veneering is a book unto itself and is well worth learning, but will not be addressed here. Best of all-in my opinion-is the attached solid wood edge. This has the added advantages of adding a fair degree of stiffness to the plywood that might extend over the knee hole of a desk for instance, AND makes the plywood look thicker and more substantial then it's 3/4 inch thickness, AND makes the underside of your work surfaces a lot more friendly to fingers and other body parts. All these advantages apply equally to particle board, melamine board, and MDF. (A favorite method of mine, for instance, is to make the work surfaces out of the white melamine 3/4 inch board and use solid 1x2 oak for the edges. Comes out beautifully, if just the tiniest bit sterile looking.)
MORE SOPHISTICATED TOOLS:
Before we get all carried away with tools -power tools or otherwise, I must stress that those things that you can not do with simple hand tools, you can get them for yourself at the home-center store for a buck or two per cut, -particularly the long straight cuts you need made in the sheet stock. This not only saves you the cost of buying power tools you might not really need, but it will give your a good straight cut and it helps you move your materials around as well as makes it easier to get your wood into / onto / out of your car. (This explains, by the way, why these stores are willing to make these cuts for you.) And trust me on this, life is way too short to rip a 4 x 8 sheet of 3/4" hardboard plywood with a hand saw.
Just a few words on buying saws and planes etc. It comes down to a compromise between cost and utility. Power tools are the fastest, but most expensive. This is obvious. What is not so obvious, however, is the learning curve involved, and the quality of the result. I offer the following to someone who has no experience but is willing to spent some time making mistakes, (which is how to learn after all), and someone further who I presume might benefit from some tools of low cost / high versatility (but perhaps not so much speed) / high quality output / and (finally) short learning curve. Let me stress this with some different words. What I propose is LOW cost, HIGH versatility, LOW learning-curve, and MODERATE quality output, but finally -LOW efficiency. I assume that if you have the power tools, you know how to use them. The following then, is for the benefit of the neophyte.
SAWS:
For our purposes, the miter box and saw are the classic choice in tools, and apt to serve the non-woodworking homeowner well. But lately, I have been experimenting with Japanese backsaws. Any experienced woodworker owes it to himself to try these tools out. It's a short step from these pretty-darn-expensive saws to the work-a-day PVC saw used by plumbers to cut plastic pipe. This is a GREAT little tool for the money. Doesn't do anything perfectly, but does a lot of stuff VERY well indeed. Besides, it is delicate enough to use in the kitchen for stubborn bones as well. Moral of the story here is that if you are new to such things, and are buying your first hand saw, have a close look at the saws they have in the plumbing section.
PLANES:
People forget that before the advent of routers, ($75 to $200 and $20 for the bits), the old timers used hand planes, and there are still some things that hand planes do better then any other tool, -and a bunch cheaper, -and they don't need to be set-up and adjusted. I carry a small block plane in my nail belt when I'm doing finish installations and yet I have 3 routers in my shop. One of these little puppies -the block plane- and some sandpaper will take you a long way. One or two last words of advice, -better to get a high quality small block plane than a cheap larger one. And unless you have the ability to sharpen edges, you might pick up a spare blade when you buy the plane.
MORE SOPHISTICATED TECHNIQUES:
Permit me to warm up to relatively skillful and/or tool intensive work by illustrating the semi-simple technique of doing solid edging with particle board and pine 1x2's, and simple hand tools. (The tricky part of solid wood edging on hardwood ply or melamine has to do with getting everything even without needing to sand down the sheet stock. If it gets sanded down too far, the surface is ruined. This is not a problem with particle board and pine, which can be sanded and filled as much as necessary before being painted.)
The first task is to get the particle board cut to size. It can be cut easily with a circular saw and straight edge of some sort. See below for advice on dimensions and layouts. You will also need some pine or fir 1x2's. Best to spend a little money here and get the good stuff, as the cheap stuff is full of knots and usually very crooked. Figure out how much you need based on using full length pieces. A hammer, glue, masking tape, perhaps a carpenter's pencil, and some 6 penny finish nails will finish your shopping.
| If you need to butt the edges of your particle board together, (you are making countertops etc. that are longer then 8 feet in some dimension), it is best to butt them over a case and use a few extra screws. If this is not possible, simply screw a pine or fir 1 x 4 to the underside of the joint. If you are using simple particle board, go ahead and drive some screws in from the top using the above technique. You will need to fill these holes before you finish your work surface but this is a worthwhile trade off. (If you are using hardwood plywood however, you need to do it from the underside and you need to use a few more screws because driving a screw into sheet stock this is not quite as strong as drilling through the sheet stock and into the board.).
There are a couple of possible ways to go with your 1 x 2's. Basically, it comes down to making them pretty before of after you put them on the particle board. The simpler way to proceed is to glue nail them on first and plane and sand them second. Notice I say simpler, not necessarily the fastest. The second approach is probably more complicated, but possibly faster. It does require some extensive use of sophisticated power tools however. (Here again, if you are using expensive hardwood plywood, you want to think hard about using the second -more fussy approach.)
| Once you have your cases screwed together and shims of some sort sorted out, use the 1 1/4 inch drywall screws to attach the particleboard top to the top of your cases. Drill up from the under/inside of the top case, and try not to drill all the way through. If you do, you only need to fill the hole with some mud or spackle. Now with your board firmly in place, use the hand saw to cut the pine 1x2's to length. If you are less then confident making accurate cuts, you can cut everything long, and cut the excess off after it's all nailed together, but this way takes longer. Do not forget to allow for overlapping the ends of the pieces at the corners. Drill 3/32inch holes every 12 inches or so along the 1x2. There needs to be an extra hole 3 to 4 inches from each end, and they all need to be 3/8 inch from the top edge of the 1x2. Take some care to get these holes drilled as straight as possible as they dictate where your nails will go, and you don't want them to break through the surface of the particle board.
|
Now put a length of masking tape on the underside of the edge of the particle board so that about 1/2 inch sticks out. This is to make sure that the glue stays approximately where you want it. Run a generous smear of glue along the top half of the 1x2, and put it against the edge of the particle board, being careful to push down on the masking tape so it doesn’t get in the way of your glue joint. Then press the tape into place on the back side of the 1x2. This is a good place to have a helper because it takes about 2 hands to hold it all in place while you are using two hands to nail the edge in place. Drive the nails carefully into the edge of the particle board with the top edge of the 1x2 as close to the top of the board as possible. It is better to have it stick up too far then it is to have it be too low, but neither is catastrophic. Use a nail set to drive the nails just a little below the surface of the wood -1/8 inch or so. If you don't have a nail set, a big nail works in a pinch. Repeat for all the other exposed edges and let it dry over night.
This last bit is probably for the guy or gal that took the first approach, -nailing it all together before smoothing and sanding. Use your new plane with it's nice sharp edge to even out any areas where the 1x2 and the surface don't quite line up. Please do not expect to be able to sand down these unevenness by hand just to save your self the cost of a plane. If the plane is too hard to push, you need to expose a little less blade, but you are apt to need a little elbow-grease and effort to get through the particle-board. (Trust me on this, life is too short for sandpaper, and a plane is a reasonable compromise on the high cost of power tools.) Round a nice finger-friendly corner on all the edges of your 1 x 2's. Don't forget to round the corners of the desktop itself. This is where bruises on the ol' thighs tend to come from. Be careful to cut "out" of the grain of the wood or along the length of the grain. If you cut "into" of the grain, you will will tear big splinters out of the ends of your 1x2's. If you are making a desk, you might also want to round off the back of the underside of the 1x2 lip over the area where your knees go. A final note on using the plane. Hitting nails will ruin it. Stay away from nails. If they start getting close, set them a little deeper. Use a little drywall mud, or spackling to fill in any low spots and nail holes, let it dry, sand it, and paint it. Done.
This is about as far as we can go without involving some power tools and the skills necessary to use them. Anything is possible with a few hand tools and sufficient patience, but the following is a soup to nuts approach to doing an entire room of casework and work surfaces -sort of a hobbyist or collectors dream room.
FULL BLOWN INSTALLATION:
While I offer some advice as to it's construction, there is no substitute for the necessary skills. (-well, no substitute except some amount of patience, which would develop the skills anyway.) If you decide you need to hire a pro, there is still a lot that you can or need to do your self. (Once again, check out Hiring Carpenters and other Useful things) At the risk of playing to stereotypes, the following rather assumes a husband and wife team with a weekend and a few basic home power tools. Some of these tasks all but require four hands, and company makes it all go more easily anyway. Enough said.
THE DESIGN PROCESS:

The first step might to be develop your layout if you haven't done so already. It is probably easiest to use graph paper for this purpose. Measure your room and divide by it's dimensions in inches by 16. This will give you a number of "layouts". Draw out the room outline with each grid representing a 16 inch square layout. (You may notice that your tape measure has a little "STUD" label every 16 inches.) Or make a layout equal to some squared number of grids (4, 9, 16 inches for example) if you are interested in sketching in more detail. Now develop your design by drawing various boxes representing the cases, and various lines representing work surfaces and so forth. Don't forget to add display cases above the drawer cases and counters. As a rule of thumb, use the following table for some of your dimensions, but they are only guidelines after all, and you may decide to modify them to suit your exact purposes. One word of caution however, it is better to err on the side of too big then it is to make them too small. Who has ever had TOO MUCH counter space?
Additionally, don't pass up the opportunity to build yourself some custom furniture. This may be as simple as a window seat or -with some upholstery- a comfortable bench seat. "Custom furniture" is sort of a catch work for anything that fits your body.
DIMENSIONS of WORK SURFACES:
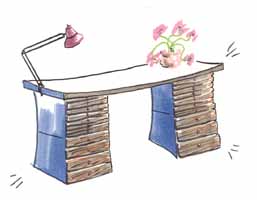
- Desks: -24 to 36 inches deep by 48 to 60+ inches wide -and even wider is very nice indeed
- Counters: -typically 24 inches deep (and this allows you to get two counters out of a single sheet of plywood.)
- Knee Spaces: -absolute minimum, 18 with 24 inches wide being better. Spaces for the higher stools etc. can be a bit narrower, and 36 inches is not unreasonable for executive desk chairs.
- Drafting / Drawing Tables: -typically 36 inches deep and 60 inches wide.
- Cutting tables for sewing: -36 inches wide, and as much as 8 feet long.
If you are not altogether confident of your design, you can test it out by stacking the various components up around the room per your design. Do not forget to add an inch or two for the extended edge of your surfaces. This is done by simply moving the cases out a bit farther then where they will actually be placed. Do not begrudge yourself sufficient space for you body though. Bumping your thigh on a protruding corner once too often will make you regret having gotten carried away with building just a little too much counter etc.
HEIGHTS of WORK SURFACES:
The next decisions you have to make have to do with height. The beauty of my system is that it allows you to customize in this direction to an optimum degree. Desks and counters are made to fit the average to short individual. Sort of... -kind of... -some of the time. This is to say that they are EXACTLY right for a tiny little part of the population. (If you are, for example, a tall person, you probably have not used a work surface that was just exactly the right height since you were 14 years old or so. Trust me on this, it is an all but religious experience the first time you use furniture etc. that actually FITS. The same could also be said for folks at the left end of the old bell curve too.) The following lists some of these basic "rule of thumb" heights.
- Desks: -28 - 32 inches
- Counters: -36 inches, (38 to 40 is not unreasonable for tall people)
- Secretarial Returns (the lower part of a desk for typewriters and computers): -26 - 28 inches
- "Close Work" Surfaces (jewelers benches and so forth): -34-36 inches
If you plan to put display cases above the cabinet -consider putting fluorescent lights under them and be sure to lift them a foot or more off the countertop. The above ideas and dimensions are expressed in a series of CAD Drawings that may be opened as PDF's.
INSTALLATION TECHNIQUES:
First tip I must not forget is to suggest you put up the display cases first. If you are putting book cases directly above the custom cabinets and / drawer cases, go ahead and build the bottom ones first. But if the display cases float above the custom cabinets, it's easiest is to do the display cases first.
The four different heights of my drawer units (12, 16, 24, and 32 inches), allow a fair degree of adaptability, but the real trick is in building your own toe kicks. These are the recessed area under all your kitchen cabinets for example. While this may seem a bother, it is very worth while to add this feature. Here again, it is one of those places where if you neglect it, you will wish you had taken the extra time after having stubbed your toe once too often.
Building toe kicks is not difficult. The simplest approach is to simply nail together some 2x4's into a rectangle. Now a 2x4 is actually 1 1/2 by 3 1/2 inches and a 2x6 is 1 1/2 by 5 3/8 inches, but they can obviously be ripped to any height dimension you like to put your work surface at EXACTLY the right level. A little extra effort to determine what your personnel IDEAL height might be is going to pay off well in the long run. Toe kicks are typically 2 to 3 inches deep and 3 to 5 inches high. (If you have particularly big clumsy feet make them bigger, doesn’t matter, they are your toes after all.)
Once again, spend an extra buck or two to get the prettier 2 x 4's at the home store. And use 3 inch -#8 drywall screws to put them together. Spackling is very nice, but drywall mud is cheaper and easier to sand for touching them up. Use an good oil enamel of you can find it, and give the exposed portion of the toe kicks two coats. Failing oil enamel, use a gloss acrylic trim paint. You can paint them to match your walls, but you would probably be better off using a dark neutral color. Black is nice, if a bit dramatic.
If you are putting it all down over carpet, and the carpet is neither too thick nor unevenly worn, all you have to do is lay them down and the subsequent steps will hold everything together. If they are going over a hard floor, you might want to use some little angle brackets, but don't get carried away. Two angles per straight run is probably sufficient, and three for "L" shaped runs is apt to be enough. If your floor is very uneven, and the toe kick actually rocks, some shims are going to be necessary. If you are, or have one at your disposal, a carpentry sort of a person is a very handy thing about now. You should try to get everything all level and square at this point, but it is not critical. Little unevenness can be sorted out as you go along.
With the toe kicks down, level (sort of) and attached as necessary, screw the cases to them and to each other. There is one critical bit here. If you are using two "cubes" or "tails" on top of a "wide", you MUST be sure they are thoroughly attached side-to-side to one another. This makes the two units act as a single STIFF unit -otherwise, there is a tendency to cause the top of the "wide" cases to sag when they are underneath two "cubes."
Use the tops of your cases and a level to transfer a mark to the wall that is the same height as the top of the cases. If you are going over carpet and the carpet is particularly thick and cushy, you need to take a guess at how much the case will sink into the carpet when it is full of whatever you will be putting into it. This is strictly a matter of guess work, but 1/8 inch might be a reasonable place to start. If everything is pretty level, run a 1x2 firing strip around behind the cases to act as a cleat to hold up the back of your work surface. Use 2 1/2 inch drywall screws for this and be careful to get them into studs.
It is quite possible, -particularly if yours is an older house, that you will find these marks are not level. This becomes a problem when your work surface spans over a knee hole, particularly a wide one, and a bigger problem when you go around corners. The simplest solution to the problem is to ignore it. If the differences are not too bad, -say less then 1/4 inch per 4 feet of wall, you might get away with the "ignore it" approach. This is particularly so in the case of a 24 inch or wider work surface made of plywood. The 6 inches (or more) between the wall and the back of your casework allows the work surface to flex enough to sort of even things out. A somewhat related fix is the old "compromise" approach. Blend your line up and down as necessary to follow the uneven tops. It might be helpful to disregard the 1/8 inch allowance for the carpet and figure your work surface will just slope down a tiny amount for either approach.
On the other hand, if your floor is particularly uneven and/or you are putting your casework right against the wall for a shallower countertop, it is possible that neither the "ignore it" nor "compromise" approach will get it. This brings us to the "shim it" solution. This solution has a tendency to get out of hand and result in much frustration for all concerned. But if it can not be helped, it can not be helped. Find your highest case -(actually this is the highest part of your floor), transfer a line off of and onto the wall, and trace this line level around the room as necessary. Run your 1 x 2 cleat around the room as above. Then use your level to determine how low each case actually is relative to the highest case. If it's 1/8 inch or so, you need only shim up the front of the case. More then 1/4" though, you will want to split the difference between the top and the bottom of the case. This means a pair of shims between the toe-kick and each corner of the front of the case, and two more under the counter/desk top at the top of the case. Trust me on this, the "shim it" approach involves elements of both the "compromise" and "ignore it" approach. If you are the sort that can simply not abide things being off by some small amount, have someone else to do it, (...or move to a brand new house.)
Now comes the fun part. Use some masking tape to hold any shims on the top of your cases in place, and begin setting boards in place for the work surfaces. These should be cut a little oversize so you can trim them to fit your walls with some precision. You will find that your walls are not straight nor are your rooms quite square, and I do not care how new your house is. This is easily fixed however. Find the widest gap between the board and your wall, and find a good stiff compass or something that will trace out a line this wide with the wall as a pattern. It's possible that a carpenters pencil is all you need, or failing this, a regular pencil with something taped behind it will work. Cut to this line, and try it for fit again. It's likely that a few strokes with a sharp hand plane will bring it to an exact fit. If your wall is particularly uneven, or if you need to go around obstructions of some sort, or your are not too confident about cutting up your expensive hardwood plywood, or if you are one of the above mentioned fussy ones, or some combination of all the above, a $5.00 investment in a 1/8 inch DOOR SKIN to make a pattern with would be a VERY good investment. If you can find a big sheet of card board, this will work too, but door skins are better because you can take off a little sliver of maternal at a time.
If you are doing a "L" or "U" shaped surface, do the inside (the piece to which the other butts) first, and adjust the angle of the butt joint on the subsequent piece. Do this BEFORE you scribe it to the wall though. If you have a butt joint meeting over an open area, screw and glue in a scrap from the bottom to act as a cleat. If you make it 6 inches or more wide, it is surprisingly strong. You can also make a "L" or a short "U" from a single piece of plywood, but this requires careful sawing, and fussy scribing.
Permit me to close with some general advice.
-
If you start running out of patience, stop already! Remember that things change, and as they change, you will want to change your set-up. So it's never really done. And if it's never gonn'a be done anyway, don't sweat it past the point it's not fun today.
-
It often seems to me that the difference between a craftsman and an amateur is largely the pains the pro takes to make his or her job easier. Sort of deliberate laziness. Do you have yourself a good clear work surface. Is it clear and the right height? Are you using the wrong tool to save yourself the bother of digging out the right one? Good lighting? The first thing I do with any project in my shop, for instance, is to start a pot of coffee.
-
Perhaps the most important tool in my shop is my clipboard and pencil. I (almost) never forget anything when I go to the home-center store is because I scribble everything down as the need arises.
-
And on the subject of writing stuff down, I have taken my casework to antique- collectable- train- railroad- gun- doll- coin- sport/ bubblegum card- knife- rock & mineral- etc. etc, and again etc. --shows. It seems to me that the people who most enjoy their collections, have notebooks full of details, often meticulously organized. Design in a place to file you papers or store your notebooks and reference materials.
-
Check out the Community College in your area. Wonderful resources for everything from learning drafting or interior decorating to taking a Furniture Building class just to have access to the tools. In this part of the world, the course description actually suggests that this is an acceptable reason to sign up for the class.
-
Save the finishing for another day. I fact, given the need for drying times, for each layer of stain, sealer, and topcoat, etc., save the finishing for several "another days". If you are using something smelly -and most finishes -even the "odorless" ones smell, -do the finishing the morning before you leave town for a day or two. And don't forget to have a look at Fast and Easy Finishing Techniques.
If you have any questions or comments, I'd love to hear from you. Write me at WHarv904@Hotmail.com
© 1998 Bill Harvey
|
|
|
|
|
|