Do-It-Yourself
Upolstered Inserts:
In my other writing I have mentioned that I am not skillful w/ fabric. Fussy annoying stuff fabric. Nothing at all like a nice piece of wood. None-the-less, I have some techniques that work pretty well -even for people like myself with limited patience & skill with fabric. Here then, is how I make upholstered inserts for my shadow boxes. (And if I can do it -so can you.) They are also a neat way to display smallish things -things like a collection of costume jewelry-- out on a surface on a wire stand, or for that matter, hanging on the wall.
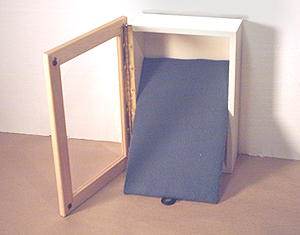
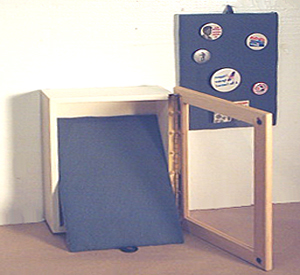
The little ribbon handle can be used as a simple hanger. It looks a little old fashioned but perfect for a collection of small antiques.
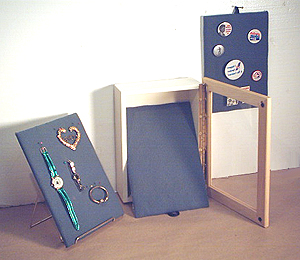
Omit the ribbon handle (see below), or if you want to keep your options open, just fold the ribbon back and tape it down.
Tools you will need:
Scissors
Utility knife or saw -depends on what you are using for a backing board
Metal rule or framing square
Tape Measure
A few sheets of newspaper (to keep the spray adhesive off the kitchen table)
A pencil, pen, or (best) a felt-tip pen
And don't neglect to get yourself a big-uncluttered work space -ideally outside.
Materials you will need:
Backer-board:
This can be as simple as a nice crisp piece of corrugated cardboard -without creases or bent corners please. For bigger backers, I cut a piece of 1/8" hardboard. Find someone w/ a table saw and it's easy. Or for something requiring no tools and is somewhere between corrugated and hardboard -strength wise- drop by a framing shop or big craft store and have them cut you some heavy press board. (Matt board is nice, but you are paying for pretty colors. See if they don't have some of the heavy grey stuff they use behind the artwork and matt board.) Foam core is another nice option. Cuts w/ a utility knife.
Padding:
You may not need padding if the fabric you are using is thick and fuzzy -something like fleece. Otherwise, get some polyester or cotton batting or blanket filler. (Cotton is supposed to be better for curatorial purposes, but it's a little harder to find and polyester is pretty inert.)
Fabric:
This is a whole can of worms. Check out my article A Visit to the Fabric Store for lots of advice on archival-safe fabrics. For the moment though, consider the aesthetics and authenticity of show-casing your collection of single item. Antique jewelry might like velvet. Political buttons, cotton printed in red, white, and blue. Antique tools -burlap. Use your imagination. And if you are of the male gender, you might find a way to get advice from someone from t'other side or at least be extra nice to the people in the fabric store. Enough said.
Ribbon:
8-12" of something about ½" wide. I like black or grey grosgrain, (pronounced groh-greyn), but what ever floats your boat.
Spray Adhesive:
The cheap stuff works quite well and lets you be just a little tentative. The expensive stuff is for doing archival stuff and sticks by-gosh forever.
Thick paper, poster board or chrome:
BTW -I find everything I need to make an upholstered insert at Walmart -provided I am using corrugated for the backer board. (The stores in my neighborhood sell heavy duty cardboard for school science-projects of all things.) They also sell nice fuzzy fleece, ribbon, spray adhesive, and poster board. You may have to wander from the fabric section to office supplies to home improvements, but it's all there.
Here's what to do.
Cut -or have cut- your backer board. If it's going into a shadowbox, I cut it about 1/8 to ¼" smaller then the inside of the shadowbox I'm working with. Depends on how thick the fabric is. If you are making panels for the wall or a wire stand on top of your piano, don't worry, but remember rectangles are more pleasing to the eye than squares. Not a rule, just a suggestion.
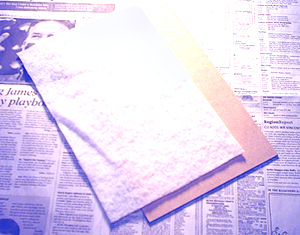
Trace around your panel onto the padding and cut it out.
If it's a big panel, hit the edges with some spray stuff and stick the padding to the backer board. No need to get too fussy.

Now put down a big piece of newspaper -you are about to do some serious adhesive spraying and -what do you know- adhesive is sticky & messy! Spread out your fabric -or one corner of your fabric, and put your panel padded-side-down on your fabric, but here comes just a little math. You want your fabric to be 1 inch (for small to medium panels) to 1 ½ inch, (for big panels) bigger on all 4 sides. So you have to double this margin, and add it to your board. Leave the panel cum padding centered on your fabric.
Here is how to make the little handle. Find the middle of a short side. Draw a line up the middle of your panel. Cut yourself a 8 to 12 inch piece of ribbon. Cover the part of your backer board where the fabric will go and spray some adhesive over your mark. Be generous. While it's tacking up, cut a 3x5 rectangle of poster board. (Read the instructions on the can -you get a stronger bond if you let the goo dry just a little.) Spray some adhesive to the 3x5 poster board too.

Fold the ribbon in half and look at my picture for how to make a cool loop. Stick it along your mark. Let it stick out about 1," but DO NOT stick it down where the fabric will go. Then stick your 3x5 piece over the ribbon and rub it down well. You should end up with a nice little ribbon loop handle. Fold it back out of the way and tape it down with some tape that isn't too enthusiastic.
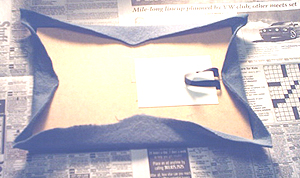
Middles glued down, (handle out'a the way). Now comes the only tricky bit. Spray some adhesive along the edge of your backer board and the fabric that is showing from under the board. Let it tack up for a minute. Start at the middle of the long side and pull the fabric out, and then fold it in and stick it down. Alas, there is no way I can write about just how hard to stretch it. The trick is to pull just hard enough to pull out the wrinkles. Now fold over the middle of the short sides. Work your way out to the corners -going from long side to short side in no particular way except to pull out the wrinkles. Mind you, you can't see these wrinkles because they are on the finished side and you are working on the back side, but it can't be helped.
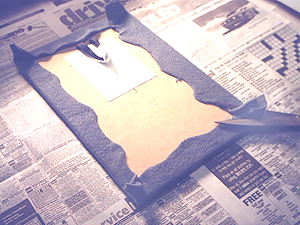
As you get to the corners, continue stretching and pinch the fabric into a little peak. Flip it over now and see how you did. If you did it right, there will be no wrinkles, and the corners will look like you sewed something. (And sewing is to be avoided at all costs.) If it's all good, flip it over again and snip off the corners.
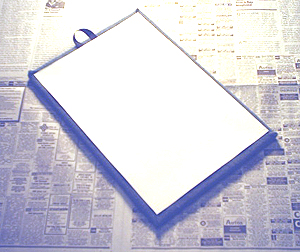
Back stuck on -w/ handle showing This part is optional, but makes for a nice finish. Cut a piece of poster board about ¼" smaller than the finished size of your panel. (It will have grown by the thickness of the fabric you have used.) Find a new piece of newspaper and spray one side of this piece. Un tape your ribbon handle and put the poster board in place. Do this carefully so you have a small (1/8") border all around. Rub it down.
That's pretty much it. You might give it over-night for the volatiles in the adhesive to evaporate and the max strength to develop -particularly if the plan is to hang it on the wall -most particularly if you plan to put heavy things on it and hang it on the wall.
It depends on what you plan to display, but you might find some straight pins are all you need to artfully arrange your stuff. Jewelry for instance. If your stuff is more substantial, invest in a curved needle and sew it down. But this is sewing and I don't do sewing -let alone provide advice on sewing -other than to suggest mono-filament fishing line. (Or dental floss -extra strong. I use it to sew buttons back on.)
Bill Harvey

